click here for the Precious Baby Girl card tutorial
**Halloween Boxes**
1- Cut box from Sizzix die (Box Candy Drawer) add glue and assemble.
2- Once your box is ready, start decorating with patterned paper on top of the box and the sides.
3- For the part that opens add some lace and then tie seam binding around, make a bow.

4- Add a sticker or a piece of patterned paper just to add more dimension on top of box, I use a piece of stamped cardstock I had from past projects.
5- Adhere chipboard star as shown in photo. I added blue glitter to mine.
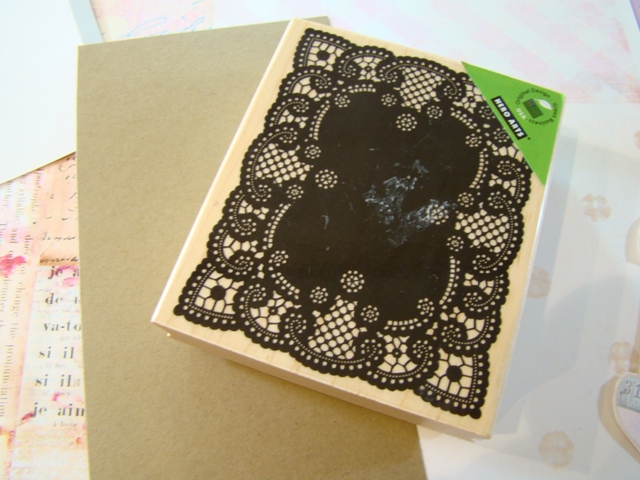
6- Punch a scalloped circle or doily, punch image from the collage:
Halloween Tickets
7- Adhere doily then image, finish with black and orange button on top of star.
Create as many as you want, these look really cute, add some candies or a small gift inside!
Supply List:
Sizzix Die Candy Box Drawer.
Halloween Stickers/ Stamps
Black Cardstock
Patterned paper
seam binding, lace, buttons,
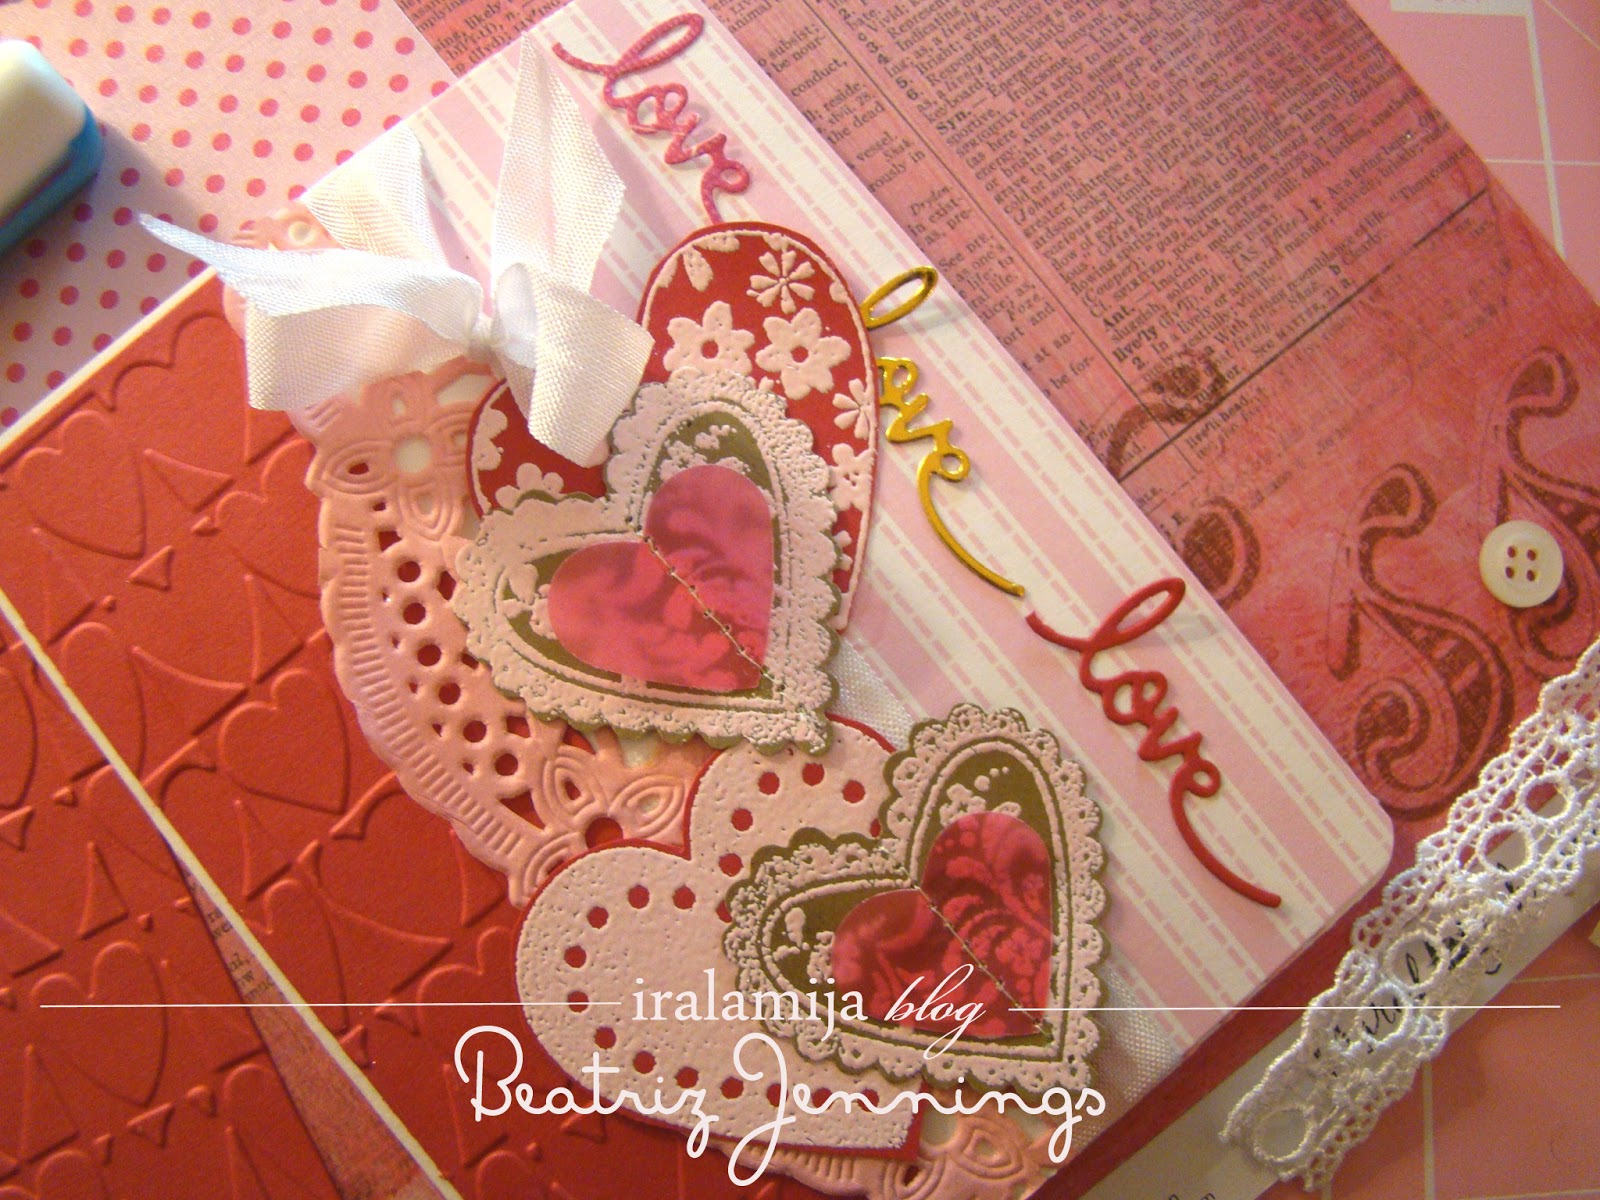
Love Love Love card:
1- Start die cutting words in 3 different colors.
2- Stamp different heart designs with embossing powder and cut around edges. Add vellum hearts on two of the heart designs as shown in photo (sewing is optional).
3- Cut a piece of red cardstock and emboss with folder, adhere on the left side of card.
4- Use the edge of a big doily and add next to the red cardstock, cut the edges.
5- Add a piece of patterned paper and adhere on the right side of card, round edges.
6- Tie a bow with seam binding around the front of card.
7- Arrange the way you want to add the hearts and words to the card and adhere (first the words and last the hearts).
8- Add embellishments in the center of hearts they can be: pearls, plastic gems and/or vintage buttons.
9- Adhere heart appliques on the embossed part of card.
And you have a Valentines day card ready!
You can also create beautiful card sets!
Supply List:
heart stamps, embossing powder in light pink.
"with love" die spellbinders
white and red Cardstock
Patterned paper
seam binding, hearts applique,
Vintage buttons.
Butterfly Box:
1- Die cut and assemble box from cream cardstock. Mine is 2.5" cube when assembled.
2- Cut different papers to cover the sides and top of box.
3- Distress ink papers and adhere to box
4- Print butterfly images from the collage:
Shabby Butterflies No 2. cut out the butterfly you want to use.
5- Adhere butterfly to the front side of your box, I added the words "sing" and "play" from old stickers I had on my stash but you can use words from this collage:
Expressions.
6- Add silk flowers and tag with stamped sentiment as shown in photo
7- Adhere button to secure flowers and tag.
8- Print and cut out tag from the collage
Big Jars and Labels (page No 2.) then stamp sentiment on tag and distress ink edges.
9- Adhere label on top of the box, wrap seam binding around box and tie a bow, don't adhere the bow since you want to be able to open your box.
10- Add a little tag with stamped number, then add a flower on top of the tag.
11- Add lace or pom pom trim on the sides of your box.
And you have finished a beautiful and easy butterfly box! make as many as you want, these are perfect for gifts, decoration or you can use them as mini cupcake boxes just make a base to hold the cupcake inside :)
Supply List:
Sizzix Die Blocks/Cubes 3D
Cream Cardstock
stamps: MSE, Stampendous, Teresa Collins
Distress Ink: Antique Linen (Ranger)
Seam Binding, Vintage buttons, silk flowers.
Sending you All My Love tag:
1- Cut one 2.5" x 5" piece of chipboard, paint only one side with acrylic paint.
2- Use paper strips in different patterns, you can always use any paper scraps.
3-Adhere your papers on the side that has no paint and distress ink the edges.
4- Add chipboard heart embellishment on the bottom of tag.
5-Stamp sentiment banner in different colors, cut out, distress ink edges and adhere on top of chipboard heart.
5- Add paper flower or fabric flower on top of tag, leave some space to make a hole with the crop a dile.
6- Tie seam binding on top and add lace on the bottom part of your tag (I stitch my tag on the bottom to secure the lace, I added a pearl on the middle of the chipboard heart)
And you have a nice chipboard tag! you can add it to a bag for a gift or on top of a box they look so pretty and unique.
Supply List:
Chipboard
Patterned paper scraps (Melissa Frances, and Pretty In Pink digital collage)
Chipboard heart (I cut mine using 2 different Sizzix die cuts)
Silk flower, ribbon, fabric and lace scraps.
Distress Ink (Antique Linen by Ranger)
Stamps: Sentiment Banners from MSE
Seam binding and adhesive pearl.
Acrylic paint
Crop a dile
Crayon Box:
Step 1- Cut a Crayon box from card stock with cutting machine or template and assemble (mine was approx: 4.5" tall x 3" wide)
Step 2- Stamp lace image on a piece of Kraft card stock and emboss with pale pink embossing powder. Cut out stamped image.
Step 3- Cut out image from the digital collage:
Lace Holders and distress ink edges (I use antique linen from Ranger)
Step 4- Stamp sentiment on the lace holder with dark brown ink, adhere lace holder on top of the stamped lace image, add scalloped banner.
Step 5- Paint a chipboard circle (approx 1") and add glitter on top, add silk flower as shown in photo below.
Step 6-Take your crayon box and tie seam binding around, make a bow on top of the box opening.
Step 7- Finish the front of the Lace holder with more embellishments, I adhere the chipboard circle on top of the silk flower, then I adhere a mini tag with the number 1 and a small button on top of the circle, (sewing the bottom of lace holder is optional) Adhere to the front of crayon box.
Step 8- Finish with lace on the sides of crayon box.
Create more boxes and add a little something inside, I cut out more Lace holders and added one in each box with some tea stained lace, silk flowers, button etc...
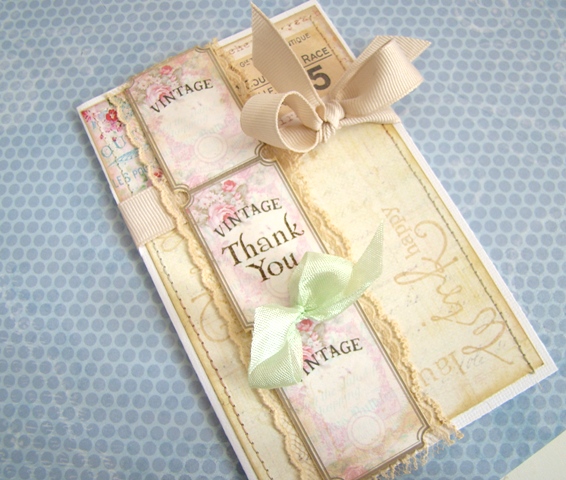
Vintage Thank You Card:
1-Cut a 7.5" x 6" piece of white card stock and fold it in half to make your card base. Add Ivory paper on the bottom part of card and a strip of the patterned paper on the top of card (I always distress ink my papers before) machine stitch edges and stamp words on the corners of card.
2-Cut a slot on the side where the card folds, tie ribbon around the card and make a bow.
3-Add a strip of lace on the left side of card. Print and Cut a ticket strip from the
digital collage Vintage Strips
4-Tie a bow using a piece of seam binding around the ticket strip.
5- Stamp "thank you" sentiment and adhere ticket strip to card on top of the lace.
6-Adhere 2 pieces of distressed card stock and then silk flower, a piece of lace and painted button on top of ticket strip.
7- Adhere a piece of lace, applique wings, and resin heart on the bottom part of ticket strip.
8- Add 2 adhesive pearls on the bottom of bow.
9-Cut excess of lace and you have your card ready!
Supplies:
white card stock.
Patterned paper:
Ivory Prima
Stamps:
Heidi Swapp
Inkadinkado
embellishments:
Ribbon
silk flower
seam binding
applique wings
lace
adhesive pearls
painted button
distress Ink Antique Linen from Ranger.
sewing machine.
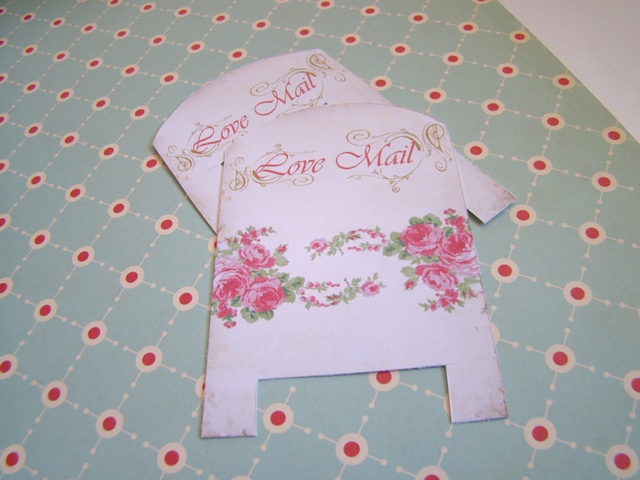
Chipboard Mailbox:
Some supplies we will need are: chipboard pieces, patterned paper scraps,
Love Mail digital collage, kraft knife, bone folder, silk and paper flowers, lace, buttons, stamps, rub ons, adhesive, glue, glitter, distress ink, scissors.
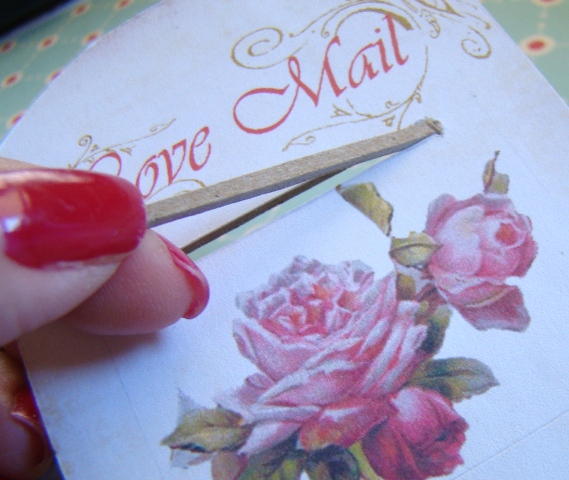
1- First I cut out 2 of the mail box images that previously printed from the digital file, you can use kraft knife or scissors.
2- Adhere the images to a piece of chipboard
3- Cut the chipboard following the shape of the mailbox as shown on photo.
4- Do the same with the other image, you should end with something like this.
5- Take one of the Mailbox pieces and cut a slot with the kraft knife (this step is optional)
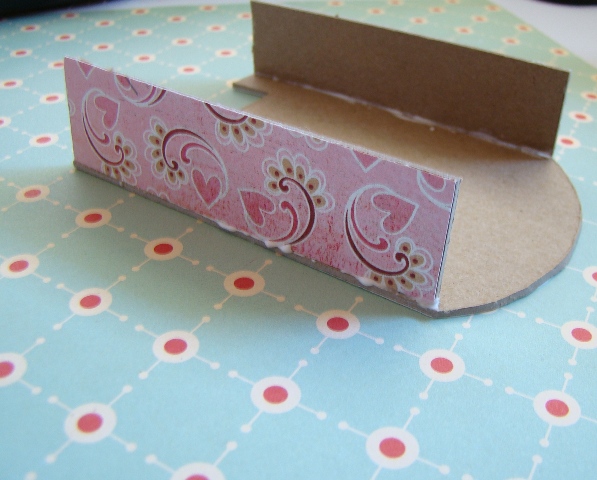
6- Cut 2 pieces of chipboard to make the sides of the mailbox, cover with patterned paper.
7- Adhere on both sides of the mailbox.
8-Adhere another piece of chipboard on the bottom as shown in photo, this will also help to hold on place the sides.
9- Adhere the other part of the mailbox on top, press and wait until is dry.
10- You have your mailbox ready and it should look like this.
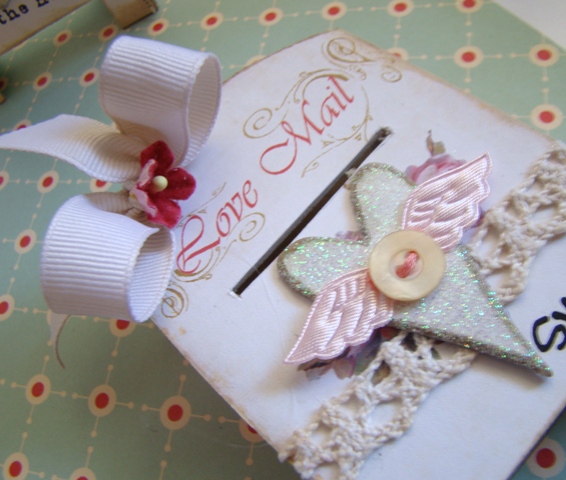
11-Now embellish with chipboard heart, glitter, button, flowers, ribbon, stamps etc...
12- I also create a little envelope (these also come in the
digital file) I use clear stamps for the outside. Then I just put the envelope inside the mailbox.
This is how the mailbox looks like once you finish it, you can create as many as you want, and add even more embellishments, you can also put inside some candy, chocolate, or just a note.