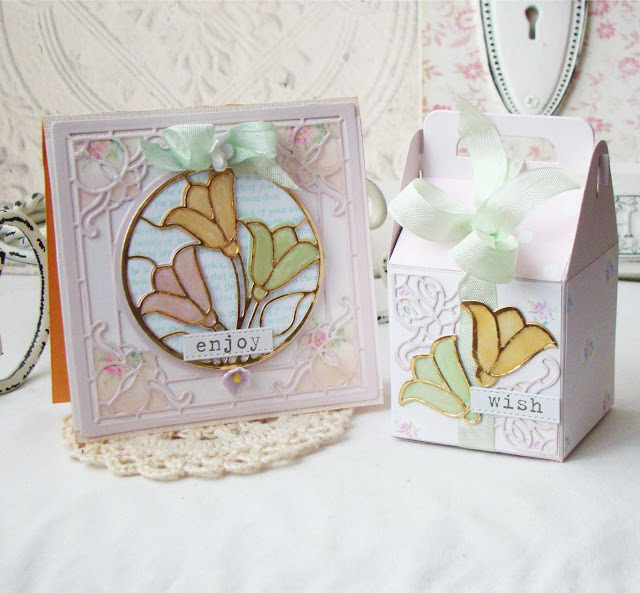
It's a miracle that little painted shards of glass can come together to create such beauty!! The intriguing lure of Stained Glass has inspired artisans from around the world to try their hand at shuffling colors and shuffling shards of glass to create something lovely to gaze upon. Today we are introducing the newest Amazing Paper Grace collection called Stained Glass Floral Bouquet, created for Spellbinders.
Dies for my creations today were supplied by Amazing Paper Grace.
Stained Glass Floral Bouquet Inspiration
Becca says that the inspiration for the collection came from her love of stained glass and never being able to muster the time to do it with real glass. Who says you can't have your cake and eat it too? Now it's easy to create with paper! It's amazing how you can give the same outline to a hand full of different artists and each will come up with a totally different look.
Stained Glass Floral Bouquet Collection
The Stained Glass Bouquet Collection is made up of 7 different die sets. They are sized for layering and include small designs all the way up to A7 designs with different frames that can make both A2 and A7 designs. The collection boasts shadow dies for each set so that whenever you don't want a multicolor design, you can layer your "die-cut leading" onto one color. The hallmark of the collection is a sweet stained glass flower and shadow in almost every set. That gives you a background die and a central motif for each set.
Attention "technique junkies" this collection is sweetly serenading you to try your favorite technique with the leading and the shards.
Here are ours:
- Fill each opening with a different color paper and add Glossy Accents.
- Ink on a hombre background before resetting your shards.
- Add a smidge of color in each opening with a Copic Marker.
- Use a different color leading - white, black, gold, silver.
- Build up tall leading with 4 layers and adhesive in between each.
My Projects for Today
I'm using S5-447
I create a cute set of card and box, I use glossy accents for the tulips and the corners of the card.
Designers Tip: Add 2-3 layers of glossy accents (let dry between layers) to add more shine and dimension to your projects!
Stained Glass Floral Bouquet Availability:
These dies and plates are available from Spellbinders right now! Click here: Stained Glass Floral Bouquet Collection.
Stained Glass Floral Bouquet Collection Blog Hop!
Click on the links to each member, they're waiting to inspire you to create something beautiful:
Visit Anita Kejriwal
Visit Linda Parker
Visit Kate Skonieczna
Visit Joanna Wisniewska
Visit Beatriz Jennings
Visit Patricia Manhire
Visit Agnieszka Posluszny
Visit Elena Olinevich
Visit Nida Tanweer
Visit Tara Brown
Visit Becca Feeken at Amazing Paper Grace
Giveaway!
You could win an Amazing Paper Grace Die of the Month! Enter to win on our new Instagram Account https://www.instagram.com/amazingpapergrace_creates/. All of the entry details are there, look for this image below:
I love your comments! Tell me, which technique do you really want to try?


Beautiful projects Beatriz! I'm anxious to try using Glossy Accents as a new technique. Your use of it is awesome! Tara
ReplyDeleteI love the softness of your cards and how you have used Glossy Accents to create a glassy look!
ReplyDeletethat stained glass look to it is just gorgeous!
ReplyDelete